Just as on land, where the nocturnal world is quite different from the daytime one, so too does a new environment appear underwater after dark. Even your most regular dive spot becomes mysterious at night. But what makes a night dive so different from a daytime dive? Here are five great night dive experiences you can only have after the sun goes down.
Bioluminescence
Bioluminescence is one of the ocean’s most magical night dive experiences. The phenomenon — the production of light by a living organism — looks like suspended fairy lights underwater. Though it’s possible to see bioluminescence on land, it’s most common underwater thanks to the many vertebrates and invertebrates in the ocean. Many deep-sea creatures use it as a defense or to lure prey, but the simplest way to experience bioluminescence as a diver is via the tiny plankton in the ocean that glow when set in motion. Simply cover you light and wave your hand through the water to create a magic light show.
Sleeping sea creatures
When nocturnal animals awaken on the reef, daylight creatures go to sleep. Lucky night divers might spy a sleeping turtle — do not disturb — and lots of reef fish in a deeply relaxed state. Scientists are still researching the nature of fish sleep, as many animals only rest and maintain awareness of predators. On a reef you’ll see many tucked away in the nooks and crannies of the coral providing them shelter and protection for the night. Parrotfish actually secrete a protective mucus bubble around themselves or across the entrance to their hiding spots in the reef to ward of predators or parasites while they rest. If you’re diving early in the morning, watch for discarded mucus bags, floating in the water like snot.
Special note: As every good diver knows, you should never touch marine life. This is even more important at night, so never touch sleeping animals or shine your torch on one for too long.
Coral
Coral reefs are spectacular during the day, but they’ll wow you at night as well. As light is filtered out, colors become muted the deeper we go. But at night, your light source is much closer — the torch in your hand. In that concentrated light, colors will appear much more vivid than during the day. In addition, colorful coral polyps open up at night to feed on nutrients in the ocean, so pause on your next night dive and give the coral a good look.
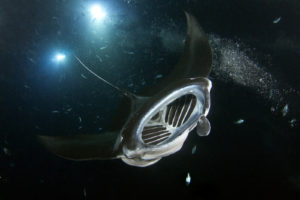
Manta rays
There are several spots around the world where you can do night dives with mantas. Lucky divers will see large feeding aggregations of dozens of mantas, unfolding like a nighttime ballet. These majestic animals swoop and fly, feeding on the plankton and small creatures that are drawn to the light of divers’ torches or the dive-boat lights. La Paz, Mexico; Raja Ampat, Indonesia; and Kona, Hawaii are some of the most famous spots for these encounters.
Enhanced perception
At night everything is different, even our perception. Not only does the darkness alter your sense of what’s around you, but it also enhances things like your perception of sound. Popular sites are usually far quieter at night, with fewer boat engines and less diver activity. Through this quiet, you start to notice natural sounds become amplified, such as the crackling and popping sounds that are far more pronounced than during the day. Various marine creatures produce the sound when they eat algae or coral polyps off the reef, combined with the sound of small shrimp snapping their claws. Keep your ears open during your night dives and you’ll hear a whole new world.
Just as on land, where the nocturnal world is quite different from the daytime one, so too does a new environment appear underwater after dark. Even your most regular dive spot becomes mysterious at night. But what makes a night dive so different from a daytime dive? Here are five great night dive experiences you can only have after the sun goes down.
Bioluminescence
Bioluminescence is one of the ocean's most magical night dive experiences. The phenomenon — the production of light by a living organism — looks like suspended fairy lights underwater. Though it's possible to see bioluminescence on land, it's most common underwater thanks to the many vertebrates and invertebrates in the ocean. Many deep-sea creatures use it as a defense or to lure prey, but the simplest way to experience bioluminescence as a diver is via the tiny plankton in the ocean that glow when set in motion. Simply cover you light and wave your hand through the water to create a magic light show.
Sleeping sea creatures
When nocturnal animals awaken on the reef, daylight creatures go to sleep. Lucky night divers might spy a sleeping turtle — do not disturb — and lots of reef fish in a deeply relaxed state. Scientists are still researching the nature of fish sleep, as many animals only rest and maintain awareness of predators. On a reef you'll see many tucked away in the nooks and crannies of the coral providing them shelter and protection for the night. Parrotfish actually secrete a protective mucus bubble around themselves or across the entrance to their hiding spots in the reef to ward of predators or parasites while they rest. If you're diving early in the morning, watch for discarded mucus bags, floating in the water like snot.
Special note: As every good diver knows, you should never touch marine life. This is even more important at night, so never touch sleeping animals or shine your torch on one for too long.
Coral
Coral reefs are spectacular during the day, but they'll wow you at night as well. As light is filtered out, colors become muted the deeper we go. But at night, your light source is much closer — the torch in your hand. In that concentrated light, colors will appear much more vivid than during the day. In addition, colorful coral polyps open up at night to feed on nutrients in the ocean, so pause on your next night dive and give the coral a good look.
Manta rays
There are several spots around the world where you can do night dives with mantas. Lucky divers will see large feeding aggregations of dozens of mantas, unfolding like a nighttime ballet. These majestic animals swoop and fly, feeding on the plankton and small creatures that are drawn to the light of divers' torches or the dive-boat lights. La Paz, Mexico; Raja Ampat, Indonesia; and Kona, Hawaii are some of the most famous spots for these encounters.
Enhanced perception
At night everything is different, even our perception. Not only does the darkness alter your sense of what's around you, but it also enhances things like your perception of sound. Popular sites are usually far quieter at night, with fewer boat engines and less diver activity. Through this quiet, you start to notice natural sounds become amplified, such as the crackling and popping sounds that are far more pronounced than during the day. Various marine creatures produce the sound when they eat algae or coral polyps off the reef, combined with the sound of small shrimp snapping their claws. Keep your ears open during your night dives and you'll hear a whole new world.
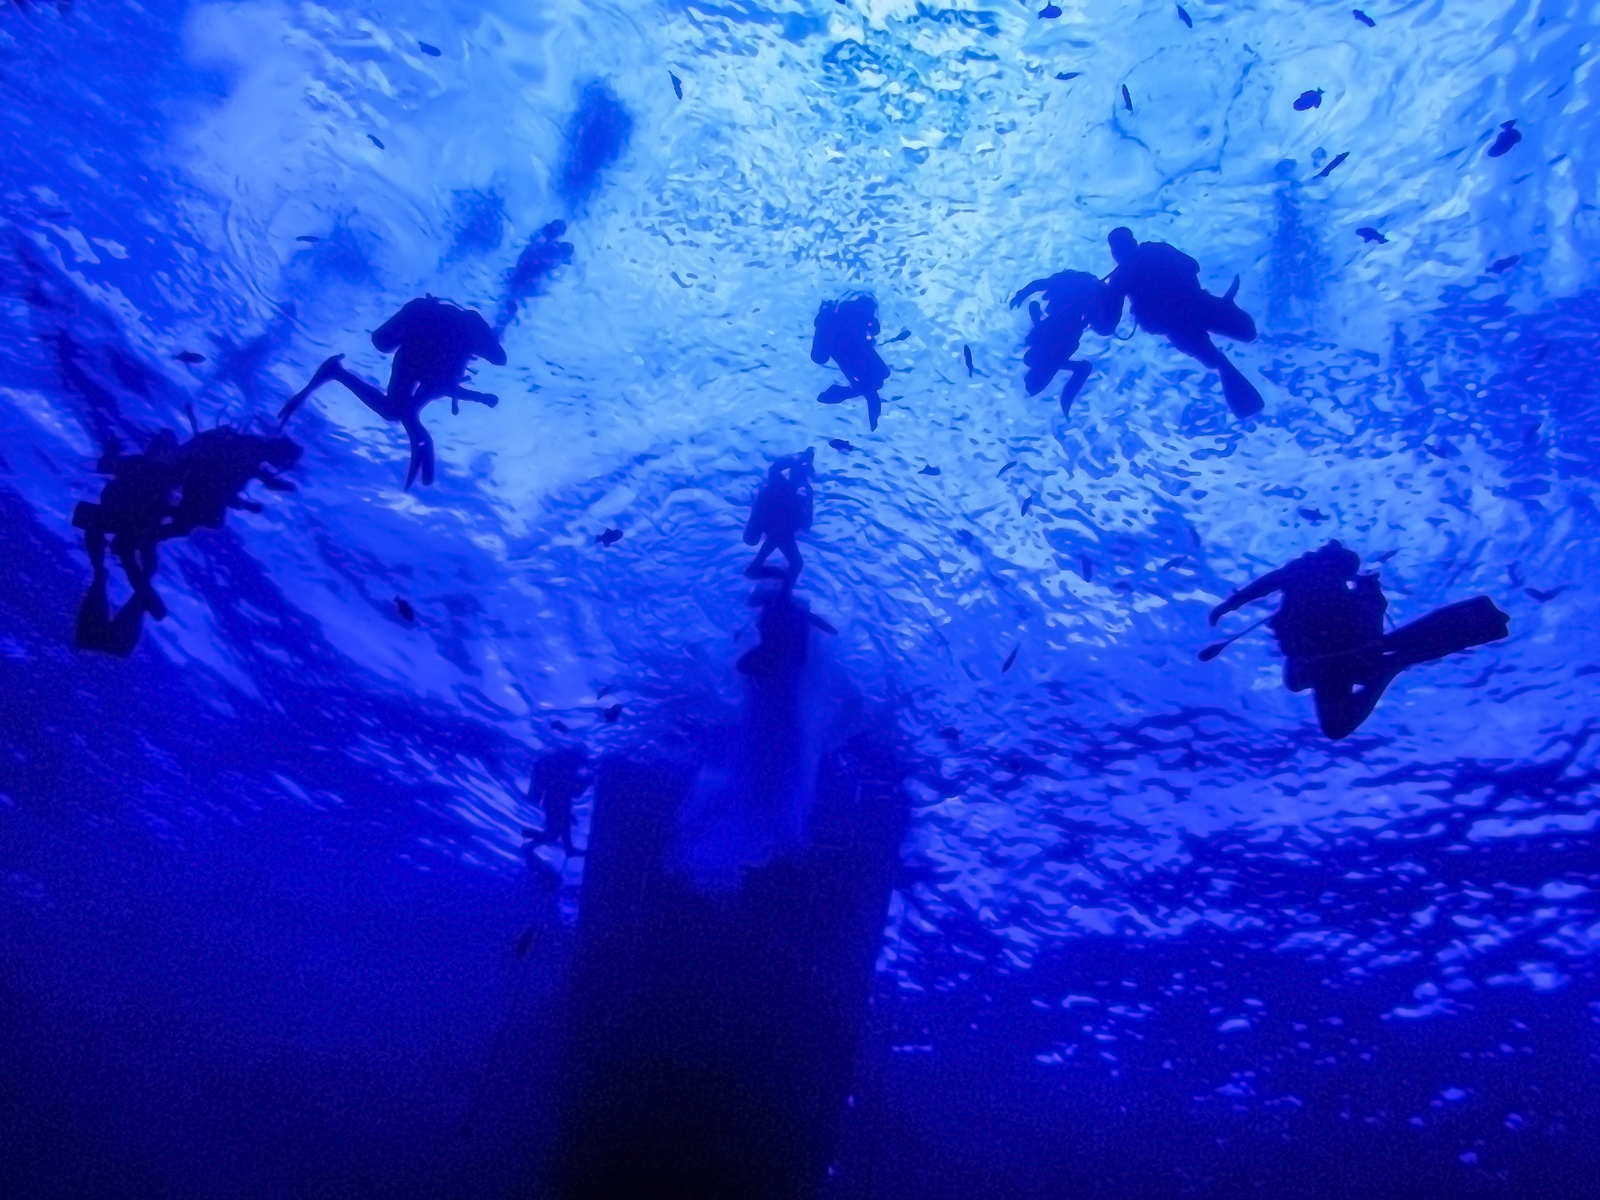
The buddy system has been a cornerstone of recreational diving since its inception. Across the globe, instructors are training new open-water divers to make pre-dive safety checks in buddy pairs, practice descents and ascents in buddy pairs and learn their initial air-sharing skills in buddy pairs. This system has evolved thusly for many reasons, but are there flaws in the buddy system? And how do we mitigate them? First, the three most-often stated reasons for the current system are logistics, safety and fun:
Logistics
For many divers, particularly novices, having a buddy to help put on or remove your scuba gear is invaluable. If a diver is struggling with a particular clip, release or awkward fin, a buddy can be very useful. Although an experienced diver may not need that assistance, those interactions can help keep a novice diver calm and confident before a dive when they may otherwise become flustered.
Safety
The buddy system began in an era of less-reliable scuba equipment. Modern scuba equipment, however, is extremely reliable when well-maintained, which removes some of the 'safety' consideration. But even taking that into account, a traditional single-cylinder recreational scuba set-up still has no redundancy. If, for example, a diver's regulator fails or free-flows at depth, they must be able to rely on their buddy.
Similarly, if the diver has not monitored his gas consumption properly, he must rely on his buddy to share air. Finally, having an extra pair of eyes and ears can help nip a problem in the bud before it's become something more serious. The buddy may notice problems before the diver himself — an unclipped reel or unsecured alternate-air source — and can help prevent more serious consequences.
Fun
We're social animals and sharing an experience like scuba diving is part of the sport's draw. After a great dive on a wreck or reef, the buzz can be palpable. Diving with a buddy allows you to experience something special as part of a group and that spirit of camaraderie is one of the attractions of a great diving trip.
Flaws in the buddy system
As with most organizational systems, the buddy system has benefits and drawbacks. Ironically, the benefits of the buddy system listed above may also, inadvertently, become its flaws:
The unknown quantity
Dive guides, divemasters and instructors at many resorts are employed as guides who simply brief and lead dives. They are not there to retrain divers or act as their buddy. Therefore, if you're traveling alone, the person who becomes your buddy for the dive is an unknown quantity.
While most resorts try to group divers of similar qualification and experience together when possible, there is no guarantee. However, you may find yourself buddied with someone who has vastly different skills and experience. It's impossible to know if your new buddy has the same style of diving as you or how responsible they are. Will they disappear in the other direction with a camera? Are you confident to potentially put your life in this person's hands? Dive qualification is not a guarantee of skill level. Do they have the same commitment to safety as you do? Will they be able to assist you in an emergency?
Tip:
If you're paired with a new buddy, discuss how you prefer to dive and undertake a thorough buddy check before entering the water. Understand their equipment configuration, controls and weight system, and ensure they understand yours. Discuss your alternate-air-source configuration and air-sharing procedures before the dive. Let them know where you prefer to position yourself in-water in relation to them and how fast you move when diving. Point out any peculiarities of your diving style or requirements. For example, if you have sensitive ears and must descend slowly using a descent line, let them know.
Disparity in buddy pairs
When a buddy pair is mismatched in qualification, experience, attentiveness or skill level, it can be a drawback for both people.
The less-experienced diver may feel intimidated by diving with a more-skilled diver, embarrassed to potentially compromise their buddy's dive, or find themselves diving outside their comfort zone, in terms of physical fitness, depth, or skill level.
Photographers or videographers are often — unknowingly — some of the worst buddies, filming the whole dive with a camera on a stick, as opposed to maintaining spatial and buddy awareness. They can be less likely to pay attention, keep in contact, monitor their own gas consumption and no-decompression limits, or have the free hands to help in the event of a problem.
Experienced divers may feel aggrieved that they've paid for a dive trip, only to become an unpaid dive leader to a less-experienced buddy. They may resent the feeling that they must 'hand-hold' the novice both above and below the surface. Their dive may also be shorter due to the novice's increased gas consumption or lack of skills. They may also lack confidence that a less-skilled buddy could assist in the event of an emergency.
This can create a problem even when the divers know each other well on land. Imagine a husband and wife buddy pair in which the wife is highly skilled and predominantly looks after her less-experienced novice diver husband in-water. This is potentially compromising if the wife has a problem, leaving her husband ill-equipped to deal with an emergency. Typical warning signs of this phenomenon are when one member of the buddy team undertakes all the dive planning, navigation and management. This behavior stunts the scuba growth of the passive buddy, turning the dominant buddy into crutch.
Tip:
The buddy system is most effective when both divers have relatively equal skills and experience. They can share responsibilities and enjoy a mutual trust. If the incongruence is too great, one will become the dominant buddy while the other becomes a burden. Speak with your dive buddy. Share roles and responsibilities. Make sure you feel comfortable with the person you're diving with. If you're less experienced, skilled, out-of-practice or lack fitness, book suitable dives. Keep your skills fresh, try to maintain or rebuild fitness and — if you can't — consider booking a private guide to give you the attention you require.
The solution
There is no clear-cut solution to some of the flaws in the buddy system. Is two the optimum number? Should you train to become a solo diver? Some say that three is a better number for a buddy team. This is because it creates a voting platform for decision-making and adds an extra pair of eyes.
Regardless of buddy-team size, train to be a better diver and better buddy. Keep your skills fresh. Maintain your fitness. Improve your skill level and, potentially, train to become more self-reliant diver. The skills you learn on a self-reliant or solo-diver course will serve you well as a dive buddy. Discuss key safety skills and procedures with the people you plan to dive with and share responsibilities. Doing so means that you can focus less on logistics and more on the dive itself.
The buddy system has been a cornerstone of recreational diving since its inception. Across the globe, instructors are training new open-water divers to make pre-dive safety checks in buddy pairs, practice descents and ascents in buddy pairs and learn their initial air-sharing skills in buddy pairs. This system has evolved thusly for many reasons, but are there flaws in the buddy system? And how do we mitigate them? First, the three most-often stated reasons for the current system are logistics, safety and fun:
Logistics
For many divers, particularly novices, having a buddy to help put on or remove your scuba gear is invaluable. If a diver is struggling with a particular clip, release or awkward fin, a buddy can be very useful. Although an experienced diver may not need that assistance, those interactions can help keep a novice diver calm and confident before a dive when they may otherwise become flustered.
Safety
The buddy system began in an era of less-reliable scuba equipment. Modern scuba equipment, however, is extremely reliable when well-maintained, which removes some of the ‘safety’ consideration. But even taking that into account, a traditional single-cylinder recreational scuba set-up still has no redundancy. If, for example, a diver’s regulator fails or free-flows at depth, they must be able to rely on their buddy.
Similarly, if the diver has not monitored his gas consumption properly, he must rely on his buddy to share air. Finally, having an extra pair of eyes and ears can help nip a problem in the bud before it’s become something more serious. The buddy may notice problems before the diver himself — an unclipped reel or unsecured alternate-air source — and can help prevent more serious consequences.
Fun
We’re social animals and sharing an experience like scuba diving is part of the sport’s draw. After a great dive on a wreck or reef, the buzz can be palpable. Diving with a buddy allows you to experience something special as part of a group and that spirit of camaraderie is one of the attractions of a great diving trip.
Flaws in the buddy system
As with most organizational systems, the buddy system has benefits and drawbacks. Ironically, the benefits of the buddy system listed above may also, inadvertently, become its flaws:
The unknown quantity
Dive guides, divemasters and instructors at many resorts are employed as guides who simply brief and lead dives. They are not there to retrain divers or act as their buddy. Therefore, if you’re traveling alone, the person who becomes your buddy for the dive is an unknown quantity.
While most resorts try to group divers of similar qualification and experience together when possible, there is no guarantee. However, you may find yourself buddied with someone who has vastly different skills and experience. It’s impossible to know if your new buddy has the same style of diving as you or how responsible they are. Will they disappear in the other direction with a camera? Are you confident to potentially put your life in this person’s hands? Dive qualification is not a guarantee of skill level. Do they have the same commitment to safety as you do? Will they be able to assist you in an emergency?
Tip:
If you’re paired with a new buddy, discuss how you prefer to dive and undertake a thorough buddy check before entering the water. Understand their equipment configuration, controls and weight system, and ensure they understand yours. Discuss your alternate-air-source configuration and air-sharing procedures before the dive. Let them know where you prefer to position yourself in-water in relation to them and how fast you move when diving. Point out any peculiarities of your diving style or requirements. For example, if you have sensitive ears and must descend slowly using a descent line, let them know.
Disparity in buddy pairs
When a buddy pair is mismatched in qualification, experience, attentiveness or skill level, it can be a drawback for both people.
The less-experienced diver may feel intimidated by diving with a more-skilled diver, embarrassed to potentially compromise their buddy’s dive, or find themselves diving outside their comfort zone, in terms of physical fitness, depth, or skill level.
Photographers or videographers are often — unknowingly — some of the worst buddies, filming the whole dive with a camera on a stick, as opposed to maintaining spatial and buddy awareness. They can be less likely to pay attention, keep in contact, monitor their own gas consumption and no-decompression limits, or have the free hands to help in the event of a problem.
Experienced divers may feel aggrieved that they’ve paid for a dive trip, only to become an unpaid dive leader to a less-experienced buddy. They may resent the feeling that they must ‘hand-hold’ the novice both above and below the surface. Their dive may also be shorter due to the novice’s increased gas consumption or lack of skills. They may also lack confidence that a less-skilled buddy could assist in the event of an emergency.
This can create a problem even when the divers know each other well on land. Imagine a husband and wife buddy pair in which the wife is highly skilled and predominantly looks after her less-experienced novice diver husband in-water. This is potentially compromising if the wife has a problem, leaving her husband ill-equipped to deal with an emergency. Typical warning signs of this phenomenon are when one member of the buddy team undertakes all the dive planning, navigation and management. This behavior stunts the scuba growth of the passive buddy, turning the dominant buddy into crutch.
Tip:
The buddy system is most effective when both divers have relatively equal skills and experience. They can share responsibilities and enjoy a mutual trust. If the incongruence is too great, one will become the dominant buddy while the other becomes a burden. Speak with your dive buddy. Share roles and responsibilities. Make sure you feel comfortable with the person you’re diving with. If you’re less experienced, skilled, out-of-practice or lack fitness, book suitable dives. Keep your skills fresh, try to maintain or rebuild fitness and — if you can’t — consider booking a private guide to give you the attention you require.
The solution
There is no clear-cut solution to some of the flaws in the buddy system. Is two the optimum number? Should you train to become a solo diver? Some say that three is a better number for a buddy team. This is because it creates a voting platform for decision-making and adds an extra pair of eyes.
Regardless of buddy-team size, train to be a better diver and better buddy. Keep your skills fresh. Maintain your fitness. Improve your skill level and, potentially, train to become more self-reliant diver. The skills you learn on a self-reliant or solo-diver course will serve you well as a dive buddy. Discuss key safety skills and procedures with the people you plan to dive with and share responsibilities. Doing so means that you can focus less on logistics and more on the dive itself.
I didn't grow up doing orienteering races or learning navigation or given any backcountry tips. Aside from binge eating Thin Mints, I had nothing to do with Girl Scouts and couldn't have cared less about hiking or camping.
As I got older and more appreciative of my natural surroundings, I became more curious. I, like so many other people, began wondering how to exist in the outdoors despite having absolutely no skill set or knowledge to get me there.
Like most people, I didn't have thousands of dollars to spend on an outdoor education course so I had to learn the old fashion way: through many, many trials and errors. Living in New Zealand, I love spending my free time hiking and exploring our incredible backyard.
Here are my top 10 lessons I've learned from spending time in the backcountry.
1. Invest in your gear
Look, I know it's expensive.
I live on a barista wage and I also can't afford to splash out at every new piece of gear on the market. Despite that, I'm here to tell you that spending money on quality gear may save your life and make the outdoors much more enjoyable.
First things first one of my best backcountry tips, NO. COTTON. IN. THE. BACKCOUNTRY.
Get that shit out of here because we do not have time for that malarky. You'll want to find synthetic materials that will wick away moisture and not drag you down and make you freeze to death if it gets wet. I, too, was dubious of the term "moisture wicking" when I first started exploring the outdoors because it sounds like a scam but trust me, it works.
Merino wools and synthetic materials will take moisture away from your skin so you don't feel damp and bogged down all the time. Your clothes will be damp but you'll stay dry! Opt for light pieces that can be layered on top of each other instead of a few bulky items. Always bring a hat and gloves, even in the dead of summer because you never know when the weather will change.
In New Zealand, it's a guarantee that you'll be walking through streams and rivers and down boggy valleys for long stretches at a time. I opt for quick drying trail shoes in the summer and waterproof boots in the winter when I know I can't afford wet feet for hours at a time.
I promise if you buy the good stuff and look after your gear, the expensive things will last you decades. If you break out the cost by the number of times you use your stuff, it's actually pretty cheap! (FYI this is also how I rationalize buying anything I lust for but don't really need).
Aside from clothes and shelter to keep you safe, I would also highly recommend investing in a Personal Location Beacon (PBL or EPIRB). Remember those Life Alert commercials about elderly people falling in the tub and not being able to get up? This is the backcountry version of that.
This is especially crucial when you're on your own. When you set off the beacon, Search and Rescue (SAR) is notified and the rescue mission ensues. I know these are expensive but they are literally life-saving devices and you can't put a price on staying alive. If you really can't afford one or don't think you'll use it enough, you can always rent a PBL from the nearest Department of Conservation office.
2. And test your gear before you go
There is absolutely no shame in wearing your new high tech hiking boots on a casual 2 km dog walk if that's what it takes to break them in.
Do not, I repeat DO NOT, bring brand new gear on amulti-day hike. Give yourself time to work out the kinks at home because when you're 36 hours into a backcountry adventure, you won't have the luxury of swapping out your gear for something more comfortable.
This goes for other gear too, not just your clothes and shoes. Make sure you have set up your tent in your living room before you take it out. Test that you actually bought the right type of fuel for your gas cooker.
These little details are not things you want to find out alone in the wild.
3. Plan, plan, then plan some more
I can't help it guys, I'm a mega-nerdy planner. I thrive off organization and am often the reception of multiple jabs and jokes for my super trusty, ultra-organized packing list of anything I might ever need in a backcountry mission.
I try to think of every scenario for the upcoming days so I can be fully prepared for what's ahead.
What will I wear at camp if my day clothes have been soaked through? Do I have a pair of sandals I can slip on to go to the toilet when my shoes are dripping wet? How many hours will I be out in the day and how many calories will I need to consume to sustain myself? What is my Plan B in case my Plan A falls through? What will I do if I get to a hut and the beds are taken?
I know it sounds anxiety inducing but it's crucial to think through the trip.
Mountain Safety Council makes it's easy to plan your backcountry trips in New Zealand by identifying unforeseen risks and hazards you might not have thought of. Headed up to a remote hut for the weekend? Plug it into MSC's trip planner.
MSC's tool brings finds the relevant alerts for DOC and MetService as well as the NZ Avalanche Advisory if you're in an avalanche zone. By planning your trip through MSC, you can also easily print, email and share your plans with trustworthy friends and family via Facebook.
MSC will tell you if there's been a reported shortage of water at the hut or if there are any significant trail hazards to be aware of. By planning your trip through MSC, you can also easily print, email and share your plans with trustworthy friends and family.
It sounds obvious but it's easy to get caught up planning for a mission and then forgetting to actually tell people where you're going and when you'll be back.
4. Know your water sources
In New Zealand, most high alpine water is safe to drink but if you're going into an area where the water quality is questionable, it might be a good idea to invest in a water purifying system. I'm a fan of LifeStraws and Steripens.
If you know the streams and rivers are safe to drink from, have a look on the topographic (topo) map to identify how many rivers you'll come across in order to plan for how much water you'll need to carry. If you're staying in a hut, be sure to research if the hut has water or if you'll need to carry your own in.
It's important you stay hydrated but let's be honest it's even more important you have a steaming hot cup of joe before your alpine start. Crucial!
Aside from drinking purpose, it's imperative to know if you'll be encountering any major river crossings.
New Zealand has a lot of beautiful rivers but very few bridges. While it might not seem like it, river crossings can, in fact, be very dangerous. I hear of deaths from river crossings every year in New Zealand. They can rise rapidly and either trap you on one side or be a serious hazard when you cross them.
Some popular tramps, such as the Gillespie Circuit of the East Matukituki Valley trails require some serious river crossing skills. More often than not, the Makarora River which provides access to the Gillespie Circuit is often impassable. I know people well over 6ft tall who have tried to cross the river in shoulder high waters. For the rest of us shorties, that means we'll be going for a swim. No thanks.
I've also learned through trial and error that it's much safer to keep your shoes on when crossing rivers here, and if it feels too rough, turn back!
Be very careful around rivers.
3 wire bridges may look scary (and they are) but they are often safer than crossing the river itself
5. Know the weather (alternatively titled: you'll NEVER know the weather)
Speaking of river crossings, the rivers may be fine at the beginning of your trip but may become impassable if you endure heavy rains while on your adventure, leaving you stuck on the wrong side. Make sure you have a backup plan in case this happens and be aware of where there might be other bridges several kilometers in other directions.
In New Zealand, as with any alpine environment, you must be ready for any and all weather patterns.
My first multi-day hike was the Great Walk around Lake Waikaremoana in the North Island. Aside from being the poster child of what not to pack that trip (more on that below), it was also the first time I've encountered every weather pattern imaginable in four days: snow, ice, hail, freezing temps, hot burning sunny days and torrential rain. I did not have a waterproof pack cover so in case I already didn't have the heaviest bag in the Southern Hemisphere, I solidified that title by soaking my packing entirely through, doubling the weight and ensuring I'd have no dry clothes for the next three days.
Don't be like me. Be smarter than me. Bring a waterproof jacket and pack cover. Hell, throw in some waterproof pants too if you know you'll be walking in hurricane conditions. You can thank me later.
Erica's non-negotiable multi-day essentials:
Two thermal tops
Thermal leggings
Hat
Gloves
Puffy jacket
Rain jacket (that's totally waterproof)
Short sleeve top
Shorts
At least two pairs of wool socks
Waterproof pack cover (New Zealand sells a great $5 yellow pack liner that also is a dry bag in most outdoor shops)
Waterproof bag liner
Erica's negotiable multi-day essentials:
Water proof pants
Windbreaker jacket
A few more pairs of extra socks (just say no to wet feet!)
Not pictured – 80kmph winds
6. There's a very fine line between not carrying too much and carrying what you need
Remember before when I mentioned my coming of age hiking experience around Lake Waikaremoana? Well, here's a prime example of what NOT to do.
I had never packed for an overnight trip before and had no idea what to bring for fuel. I'm begrudgingly going to tell you what I packed for food you can learn from my mistakes but just know I'm not thrilled with having this shameful information be public.
Here we go: a 2 liter container of cooked potatoes, a 2 liter container of cooked pasta salad, two cans of chickpeas, a liter bag filled with salted peanuts, a loaf of bread, a jar of peanut butter, a jar of jam, two sticks of salami, oats enough to feed a caravan of horses, a block of chlorate and a variety of oat bars. I ate a quarter of it and desperately tried to pawn off the rest on other hikers who looked hungry.
There you have it. From complete hiking newbie to fairly well equipped minimalist mountain woman. I'm living proof that even the most inexperienced outdoors person can get their shit together eventually if you're willing to make and learn from your mistakes. Actually, if you're reading this, learn from my mistakes so you don't have to carry the embarrassment.
While you're packing, try to think light but don't skimp on things you'll actually use and need.
A good way to figure this out is after each tramp, break down your pack into things you used and things you didn't use. The next trip, maybe ditch the things that were superfluous to the last tramp. After a few adventures, you'll probably have your packing list dialed in. Of course, there are somethings you should always carry, regardless of whether you used them last time or not (i.e. rain jackets, PBL, first aid kit, etc.)
Once you have the things you need, pack your bag with heaviest items at the bottom and lightest at the top. Mountain Safety Council has some good tips on how to pack your bag in a way that will keep you balanced and comfortable for the duration of your hike.
7. Maps are essential
It took me a long time to get on to this one.
Learning backcountry navigation was never a skill set I learned in my adolescence. To be honest, street navigation was never a skill I learned either. Thanks, Google Maps!
When I moved to New Zealand, a housemate of mine changed my life by telling me about topographical maps. I had vaguely seen them before but they were weird and foreign to me and I had no idea how to read them. She showed me an app to download on my phone (NZ Topo 50 North Island here South Island here) that downloaded the topographical information for the entire South Island on my phone.
The app works offline too so you could always pinpoint your location on the map. MSC has a great video here about how to read them.
I did a quick YouTube tutorial on how to read topo maps and in my next outdoor adventure, I was glued to my phone, matching up the contours with what I was seeing in real life. With a bit of practice and research, you can quickly learn to translate the symbols and lines on the map to what you're seeing in real life with your own eyes.
When you're in the backcountry, knowing a trail is so and so kilometers long is not good enough. You need to have agood understanding of the elevation you're likely to encounter, the type of terrain you'll be walking through (bush-bashing? rock hoping? scree skiing?) and the rivers you'll have to cross.
If you're old school and prefer paper maps, please know I admire and salute you and can you please teach me how to navigate with a compass? For the rest of us, this a great way to feel confident when you're miles away from civilization.
Just remember to take into account the battery life on your phone. If you won't have enough charge, come up with a backup plan!
Joining in on a guided trip at Fox Glacier to Chancellor DomeFollowing the orange markers through the bush
8. Know your limits
In an average year, MSC reports there are nearly 6,000 injuries, 540 people involved in Search and Rescue and 13 fatalities in New Zealand's backcountry. While I'm a huge advocate for everyone exploring the outdoors, it's also crucially important to accurately evaluate your own abilities and skill level and know your limits.
Having properly researched your adventure in advance, you should be able to make a well-informed decision if this is the track for you.There's no point in embarking on a sufferfest if you already know the hike is out of your ability.
The good thing about New Zealand is there are hikes and trails for every single skill level.
Why not start small and work your way up from there? Be honest about your experience and what you're willing to tackle and understand great skill and mountain competence only comes with time and patience. Try as you might, you're not going to turn into an Edmund Hilary protege overnight.
If you are really new to hiking or want to go with others, consider doing guided hikes in New Zealand, like some of the adventure trips with Active Adventures.
9. Learn your lessons, pay attention!
Sometimes, you'll spend weeks or maybe even months planning and preparing for an adventure and things still don't go according to plan.
Sometimes you head out for the easiest of adventures you and still end up with a bum knee. I once severely broke my foot playing charades and last winter I smashed my face after tripping on the Hooker Valley Walk, one of NZ's easiest and flattest day walks. These things happen.
If you can learn to take the good with the bad and roll with the punches, you'll be a better all-around mountain adventurer for it.
Don't beat yourself up when things go wrong. Instead, try to look back at how mistakes could have been prevented and how you can do better next time. You'll never be as skilled or advanced as you want but there's nothing wrong with good old-fashioned trial and error.
Go ahead and eat that humble pie. You'll learn from your mistakes and you'll be better for it.
10. Celebrate your victories
Don't forget to celebrate your victories, even if they seem small and insignificant.
New Zealand has a magical way of breeding phenomenal mountain athletes who are just as humble as they are talented. It's easy to fall into the trap of comparing yourself to others, finding your adventures are not quite as extreme or interesting as someone else's.
While this can be good for pushing your limits and trying things you'd never thought possible, it can also be damaging.
Be proud of yourself when you've completed your intended trip, no matter how small. Celebrate every time you come home and be thankful for your quick problem-solving skills for those moments that don't go exactly according to plan.
Being in the mountains is always a risk, but it's well worth it and the skills you acquire in the backcountry will translate to your everyday life. You'll find you're a little bit tougher, a little more resilient, a better problem solver and alittle more able to embrace the unknown.
So go ahead, give yourself a pat on the back for fording that icy river crossing, take a bow for doing the longest hike you've ever done and congratulation yourself for trying new things and learning along the way.
What do you think? Do you have any hiking tips or things you've learned from the backcountry? Do you enjoy hiking? Been to New Zealand? Share!
Many thanks to the MSC for inspiring this post – like always I'm keeping it real – all opinions are my own – like you could expect less from me!
Whether or not you’ve ever seen a shark on a dive and if you were “scared” are some of the most common questions scuba divers hear. To see a shark is an increasingly rare pleasure and privilege; the fishing industry kills an estimated 100 million sharks every year. Fins from up to 73 million animals become part of shark-fin soup. Overfishing has decimated some shark populations by up to 98 percent in the past 15 years, and the International Union for the Conservation of Nature considers almost 1/3 of pelagic shark species threatened.
And yet, the media still often wrongly maligns these magnificent animals. Misinformation, hyperbole and sensationalism are common currency, describing sharks as dangerous eating machines. In reality, leaving aside baited shark dives, they’re reserved and cautious when near divers. The risk of harm from a shark encounter is statistically tiny, but these are apex predators and thusly, divers should treat them with respect.
If you’re lucky enough to dive with sharks you can minimize your risks by practicing safe behavior around sharks. Here are our top tips for safe and enjoyable interactions.
Choose a responsible dive operator and buddy
Not all dive centers and dive buddies are created equal. If you’re diving somewhere with lots of potential shark encounters, choose a reputable and environmentally-focused dive operator. Investigate online. Look for positive reviews. Ask friends and colleagues who may have dived in the area.
Many operators adhere to strict best-practice codes to ensure the safety of environment, animals and the divers. Guides and divers should not aggravate or mistreat the shark during the encounter. Similarly, dive with a buddy you know and trust to behave well beneath the surface, both towards the animals and you.
Understand the environment
To have a successful shark encounter, first you must have a successful dive. Research and be comfortable with the dive environment. Be proficient with the dive’s conditions, whether that’s the water temperature, currents, visibility or equipment configuration.
Also, don’t dive in an environment or location where a shark is likely to mistake you for prey. If you’re diving in the center of a seal colony that’s the main prey of local sharks, you’re putting yourself at risk of being mistaken for a food source. Respect the environment and the shark’s territory and choose an alternative site when appropriate.
Time your dive
Dawn and dusk are prime hunting time for many types of sharks. There is likely to be more shark activity on a dive, but, conversely, a greater potential risk as they search for prey at those times of the day. Similarly, try to avoid shallow murky water. Bull sharks, in particular, hunt in these conditions and, if the shark cannot see the diver clearly — and vice versa — the risk of an accidental shark attack increases.
Enter and exit quietly and respectfully
This may seem a strange tip in a sport where you can’t even speak beneath the surface. However, creating minimal disruption to the shark’s usual environment leaves you more likely to observe their natural behavior and reduces any potential risk to yourself. Enter the water gently. Use steps or a seated entry where possible, avoiding the usual crashing giant stride. If a giant stride is your only option, you can opt for a negative entry and immediately leave the surface.
In that vein, try to limit your time on the surface in general. Many predatory sharks feed on dead animals or animals in distress at the surface. Similarly, some sharks prey on animals that spend extended time at the surface, such as seals — hence the penchant some larger sharks have for surfers.
At the end of your dive try, when possible, to ascend and board the boat directly. Avoid long surface swims and don’t make unnecessary noise or splashes.
Smooth and subtle beneath the waves
Move slowly and steadily beneath the surface. Relax your breathing and don’t approach or, worse, chase the shark. This will likely startle the animal and may provoke a defensive reaction.
Many diving experts recommend staying close the reef wall or seabed to avoid leaving yourself exposed. This habit has two advantages. First, a shark cannot startle you by sneaking up behind you outside of your field of vision – many sharks are ambush predators. Second, this helps ensure that a current doesn’t pull you out into the blue and separate you from the dive group.
Safety in numbers – but not too many
Dive in a group to ensure that there are always eyes not only looking for sharks but also monitoring the sharks’ and divers’ behavior. However, try not to dive in too large a group. Some sharks may perceive a large group of divers in close proximity as a single, large animal and a correspondingly greater threat. If you become separated from your buddy or group, rejoin your group — or any group — as soon as possible.
Subtle interaction
Consider yourself a respectful visitor to the shark’s environment. This is not a zoo — although you should be respectful there too, should you choose to visit one. The idea is to blend into the reef wall or seabed and observe the shark with minimal disturbance. In addition to entering and leaving the water quietly, try not to wear items that will mark you out to the shark. While there’s no definitive evidence that “yum-yum-yellow” wetsuit trim or fins attract sharks, it’s nonetheless best to avoid brightly colored wetsuits and jewelry as they may mimic the flashing of brightly colored prey.
Also, never “eyeball” the shark or flash your camera in its face, as this may aggravate it. There have also been reports that the whining of a flash re-charging attracts the animals quite close. Dive guides sometimes crackle a plastic bottle underwater by crushing and twisting it to create vibrations but note that this can sometimes stimulate feeding behavior. Humming gently may also make sharks more inquisitive and likely to swim by.
Learn shark behavior
Do your homework. Research the behavior of sharks in your environment. Read reputable articles specific to the species. Speak with local experts and guides. Sharks generally move slowly and steadily, conserving energy. They are highly evolved, intelligent animals that will display warning signals if they feel threatened by a diver’s presence. If the shark illustrates a sudden behavioral change, this is a warning. Dropped pectoral fins, a gaping mouth, an arched back and increased speed are all signs to move close to the reef wall or seabed and, potentially, abort the dive.
Don’t forget the basics
Seeing a shark, or any other large pelagic animal, doesn’t change the laws of physics. Don’t let your camera distract you. Stay with your buddy. Keep a close eye on your gas consumption, no-decompression limits, depth and ascent rate. Keep your cool.
Diving with sharks is a wonderful, humbling and beautiful experience. If done correctly, you’ll minimize the risk to yourself, your buddies and the environment and get the chance to observe these beautiful creatures respectfully at relatively close quarters.
Whether or not you've ever seen a shark on a dive and if you were "scared" are some of the most common questions scuba divers hear. To see a shark is an increasingly rare pleasure and privilege; the fishing industry kills an estimated 100 million sharks every year. Fins from up to 73 million animals become part of shark-fin soup. Overfishing has decimated some shark populations by up to 98 percent in the past 15 years, and the International Union for the Conservation of Nature considers almost 1/3 of pelagic shark species threatened.
And yet, the media still often wrongly maligns these magnificent animals. Misinformation, hyperbole and sensationalism are common currency, describing sharks as dangerous eating machines. In reality, leaving aside baited shark dives, they're reserved and cautious when near divers. The risk of harm from a shark encounter is statistically tiny, but these are apex predators and thusly, divers should treat them with respect.
If you're lucky enough to dive with sharks you can minimize your risks by practicing safe behavior around sharks. Here are our top tips for safe and enjoyable interactions.
Choose a responsible dive operator and buddy
Not all dive centers and dive buddies are created equal. If you're diving somewhere with lots of potential shark encounters, choose a reputable and environmentally-focused dive operator. Investigate online. Look for positive reviews. Ask friends and colleagues who may have dived in the area.
Many operators adhere to strict best-practice codes to ensure the safety of environment, animals and the divers. Guides and divers should not aggravate or mistreat the shark during the encounter. Similarly, dive with a buddy you know and trust to behave well beneath the surface, both towards the animals and you.
Understand the environment
To have a successful shark encounter, first you must have a successful dive. Research and be comfortable with the dive environment. Be proficient with the dive's conditions, whether that's the water temperature, currents, visibility or equipment configuration.
Also, don't dive in an environment or location where a shark is likely to mistake you for prey. If you're diving in the center of a seal colony that's the main prey of local sharks, you're putting yourself at risk of being mistaken for a food source. Respect the environment and the shark's territory and choose an alternative site when appropriate.
Time your dive
Dawn and dusk are prime hunting time for many types of sharks. There is likely to be more shark activity on a dive, but, conversely, a greater potential risk as they search for prey at those times of the day. Similarly, try to avoid shallow murky water. Bull sharks, in particular, hunt in these conditions and, if the shark cannot see the diver clearly — and vice versa — the risk of an accidental shark attack increases.
Enter and exit quietly and respectfully
This may seem a strange tip in a sport where you can't even speak beneath the surface. However, creating minimal disruption to the shark's usual environment leaves you more likely to observe their natural behavior and reduces any potential risk to yourself. Enter the water gently. Use steps or a seated entry where possible, avoiding the usual crashing giant stride. If a giant stride is your only option, you can opt for a negative entry and immediately leave the surface.
In that vein, try to limit your time on the surface in general. Many predatory sharks feed on dead animals or animals in distress at the surface. Similarly, some sharks prey on animals that spend extended time at the surface, such as seals — hence the penchant some larger sharks have for surfers.
At the end of your dive try, when possible, to ascend and board the boat directly. Avoid long surface swims and don't make unnecessary noise or splashes.
Smooth and subtle beneath the waves
Move slowly and steadily beneath the surface. Relax your breathing and don't approach or, worse, chase the shark. This will likely startle the animal and may provoke a defensive reaction.
Many diving experts recommend staying close the reef wall or seabed to avoid leaving yourself exposed. This habit has two advantages. First, a shark cannot startle you by sneaking up behind you outside of your field of vision – many sharks are ambush predators. Second, this helps ensure that a current doesn't pull you out into the blue and separate you from the dive group.
Safety in numbers – but not too many
Dive in a group to ensure that there are always eyes not only looking for sharks but also monitoring the sharks' and divers' behavior. However, try not to dive in too large a group. Some sharks may perceive a large group of divers in close proximity as a single, large animal and a correspondingly greater threat. If you become separated from your buddy or group, rejoin your group — or any group — as soon as possible.
Subtle interaction
Consider yourself a respectful visitor to the shark's environment. This is not a zoo — although you should be respectful there too, should you choose to visit one. The idea is to blend into the reef wall or seabed and observe the shark with minimal disturbance. In addition to entering and leaving the water quietly, try not to wear items that will mark you out to the shark. While there's no definitive evidence that "yum-yum-yellow" wetsuit trim or fins attract sharks, it's nonetheless best to avoid brightly colored wetsuits and jewelry as they may mimic the flashing of brightly colored prey.
Also, never "eyeball" the shark or flash your camera in its face, as this may aggravate it. There have also been reports that the whining of a flash re-charging attracts the animals quite close. Dive guides sometimes crackle a plastic bottle underwater by crushing and twisting it to create vibrations but note that this can sometimes stimulate feeding behavior. Humming gently may also make sharks more inquisitive and likely to swim by.
Learn shark behavior
Do your homework. Research the behavior of sharks in your environment. Read reputable articles specific to the species. Speak with local experts and guides. Sharks generally move slowly and steadily, conserving energy. They are highly evolved, intelligent animals that will display warning signals if they feel threatened by a diver's presence. If the shark illustrates a sudden behavioral change, this is a warning. Dropped pectoral fins, a gaping mouth, an arched back and increased speed are all signs to move close to the reef wall or seabed and, potentially, abort the dive.
Don't forget the basics
Seeing a shark, or any other large pelagic animal, doesn't change the laws of physics. Don't let your camera distract you. Stay with your buddy. Keep a close eye on your gas consumption, no-decompression limits, depth and ascent rate. Keep your cool.
Diving with sharks is a wonderful, humbling and beautiful experience. If done correctly, you'll minimize the risk to yourself, your buddies and the environment and get the chance to observe these beautiful creatures respectfully at relatively close quarters.
A farm-to-table restaurant with communal dining tables and a community spirit, the ability to order food via a mobile app are among the features that were unveiled at the official opening of the Marriott Irvine Spectrum, a new property that is set to define the future of the Marriott brand.
Whether you're trying to drive hotel bookings, leads for next year's weddings or day bookings for your spa, if the campaign flops it can be disheartening. Often the reason can be the campaign landing page.
A farm-to-table restaurant with communal dining tables and a community spirit, the ability to order food via a mobile app are among the features that were unveiled at the official opening of the Marriott Irvine Spectrum, a new property that is set to define the future of the Marriott brand.
According to the data from STR, the world has 184,299 hotels comprising 16,966,280 rooms. And based on that sample, the global hotel industry recorded an average occupancy level of 67.5% for the last 12 months ending with February 2018.
Online journey hijacking is prevalent across the web and involves unauthorized product ads being injected into consumer browsers, while visiting travel websites.
Transient travel is experiencing solid growth in bookings, up 2.2 percent overall, 1.7 percent in transient business and 2.6 percent in transient leisure, according to new TravelClick data.
According Dominic Gorham, guest relation manager at Oslo's modern luxury hotel The Thief luxury hotel service has to be more relaxed, more instantaneous, more of a real-life contact with people.
It's usually the sum of the experience that stays with them and builds affinity. In their entirety they influence where consumers spend money and time and who they give their loyalty to.
SiteMinder has secured River Palace Hotel in Italy to achieve its most recent milestone and continue its strong trajectory in the dynamic European region where forty percent of its hotel customers today are based.
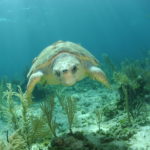
It’s common to see turtles on dives, but many divers don’t know about the threats facing sea turtle populations around the world.
Threats facing sea turtle populations globally
Sea turtles are high on the list of marine animals we want to see while diving. Although the status of marine-turtle populations varies from country to country, they are generally considered to be declining globally despite successful local conservation efforts in many countries.
Sea turtles face threats both in the water and on land. The top five threats to turtles as identified by the IUCN are:
Fisheries impacts: Sea turtles die every year from accidental entanglement in active and derelict fishing nets. We deprive them of habitat by trawling and they lose their food source because of disruptions in the food web.
Direct take: Human beings kill sea turtles for food and shells. Their eggs are poached by human and animal predators.
Coastal development: Beach degradation, seafloor dredging, vessel traffic, and loss of natural vegetation all destroy and disturb sea-turtle nesting habitats. Brightly lit beachfront homes disrupt nesting behavior and hatchling orientation contributing to hatchling deaths.
Pollution and disease: Sea turtles ingest and become entangled in plastics, discarded fishing gear, and petroleum byproducts. Chemical pollutants weaken sea turtles’ immune systems, making them susceptible to disease.
Global warming: The natural, temperature determined, sex ratios of hatchlings are becoming skewed by global-temperature increases. A predicted increase in extreme weather events will result in loss of nesting beaches and other critical sea turtle habitats.
What you can do to help
Do not purchase souvenirs made from turtle products, corals or any threatened or endangered species. CITES and many national laws protect turtles.
While traveling, choose resorts and tour operators that properly treat all sewage and wastewater and dispose of trash correctly.
Stop eating seafood. If you must, choose animals caught or harvested from verifiably sustainable fish populations. And never eat animals that have been farmed or caught using destructive or unsustainable practices, including poisons, explosives or illegal equipment.
Participate in regular cleanup efforts and remove debris you find during a dive that could entangle or choke a sea turtle.
Report any activity you deem harmful to sea turtle populations to the appropriate authorities.
Be aware of your actions when viewing nesting or hatching sea turtles.
Assist scientific research and improve resource management by reporting your sightings to conservation organizations. Support international, national and regional legislation that advocates for increased sea-turtle protection.
How to dive responsibly with turtles
Do not touch, handle, feed, harass or ride a turtle. These actions stress the animal, interrupt natural feeding and mating behavior and may provoke aggressive behavior in non-aggressive species.
Give the turtle space to move away. Do not restrict its normal movement or direction of travel. You can drown the turtles if you prevent them from reaching the surface to breathe.
Know local regulations and protocols regarding your behavior around turtles before entering the water. These are designed to ensure the animal’s well-being.
When taking photos, maintain distance between you and the turtle, and don’t interfere with its natural behavior and environment. Passive observation means that you take photos or videos in a way that won’t frighten or otherwise disturb the turtle. Do not use flash photography or videography, as these stress the turtle and will cause it to move away.
Watch out for turtles when boating. If a boat strikes a turtle it will likely cause injury or death.
Sea Turtle Awareness specialty course
Find a dive shop that offers the Project AWARE Sea Turtle Awareness specialty. This course is for Open Water Divers age 10 and older. The course offers knowledge development, two open-water dives and basic sea-turtle identification and conservation information. During your dives you’ll identify and monitor turtles, as well as remove harmful debris.
Correctly identifying a sea turtle allows you to record sightings with conservation groups and help provide vital information about that turtle and where you saw it. You’ll also learn about the decline in sea turtle populations, the importance of sea turtles to marine biodiversity, and what you can do to reduce sea-turtle threats worldwide.