Photographers often shoot thousands and thousands of images, thanks in part to affordable, spacious memory cards. This means we can instantly learn from our mistakes and take our photography to the next level far faster than in the days of film. There is, however, a downside to this new photographic freedom — we end up with a multitude of photos that we really don’t need to keep. Often photographers will just let these images accumulate until they’re facing a photo-storage nightmare, but it’s far better to sift out the good from the bad early on. Here we’ll offer a quick guide to help you keep your best underwater images — and delete the rest.

Concentrate on image focus
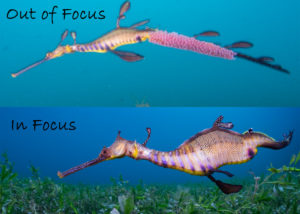
Often in underwater photography, your movement and the water’s movement meant the camera is continuously trying to perfect its focus. The result is that, in comparison to most topside photography, we end up with many images that are out of focus. You may not notice at first but when zooming in, you’ll see the difference. If you have captured multiple images of the same animal or scene, pick the sharpest, most in-focus image — and scrap the rest. Focus may not matter much when you’re posting to Instagram, but it makes a huge difference when you print a photobook or image for your home.

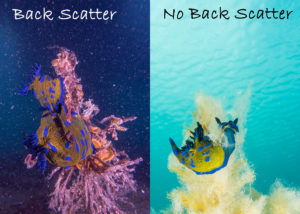
Eliminate excessive backscatter
Backscatter is the bane of many photographers’ existence, and it’s the result of lighting an underwater scene too straight-on in water that’s not crystal-clear. Backscatter means you’ll get an image in which the background is filled with hundreds of speckled dots. Some of these photos can look artistic and you can edit some backscatter out to preserve the photographic subject, but usually these images are prime targets for a quick delete. Unless you’re a photoshop expert, it’s better to have a good original image than a bad image edited well.

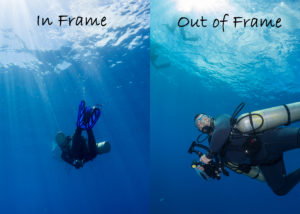
Beware the missing fin
There is a general rule in photography that if you’re shooting a photo of a fish or some other animal, including a diver, you must either capture the whole body in the shot or crop out at least 40 percent of them. A good example is an image featuring a diver whose hand is cut off in the image or whose fins are mostly cropped. These images cause the viewer’s eye to jump off the page or screen, thus ruining the sense of immersion the photo might create. Therefore, any images of people or animals with small missing parts from the frame are easy targets for your computer’s trash can.

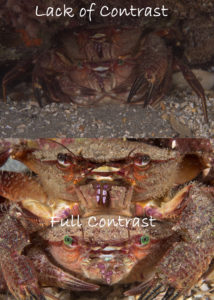
Keep contrast in mind
Finally, watch for any images where the background and subject blend together, featuring little contrast. A simple example of a badly contrasted image would be when you shoot a blue fish against a similarly blue ocean background. The lack of different tones and colors means it will all meld together, creating an image that doesn’t grab your attention or focus your eye. Unless you’re trying to show off a creature’s camouflage, it’s best to reject images that lack contrast.
The post A Guide to Keeping your Best Underwater Images (and Deleting the Rest) appeared first on Scuba Diver Life.
from Scuba Diver Life https://ift.tt/2La0hAb
No comments:
Post a Comment